Serpent Rouge - From the Moving Rig to the Lighting Booth (Pierre)
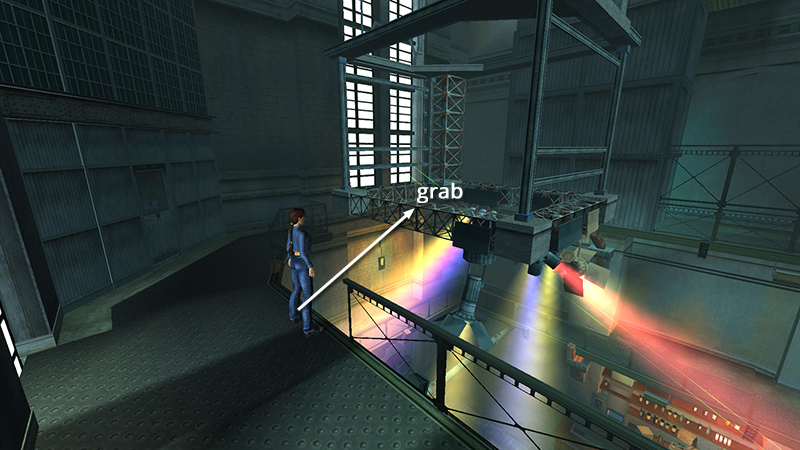
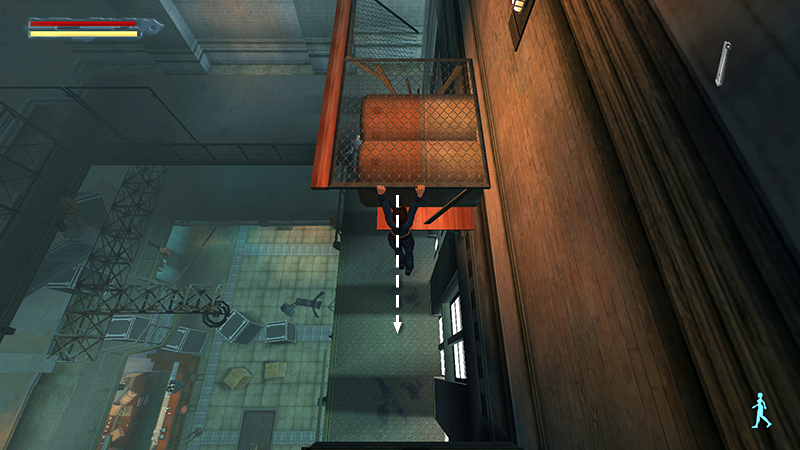
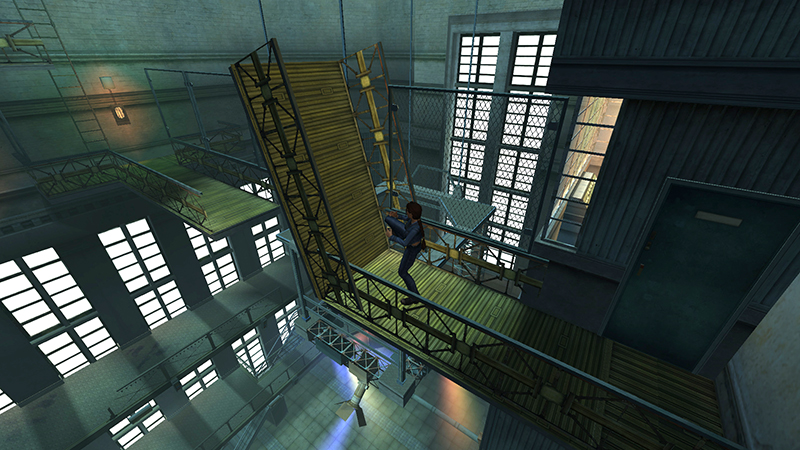
After climbing to the upper level walkway and dealing with the enemies there, as shown in the previous section, move to the break in the railing near the lighting rig that's moving up and down. Walk to the edge. Then, when the lighting rig reaches its lowest point, jump forward and grab onto it.
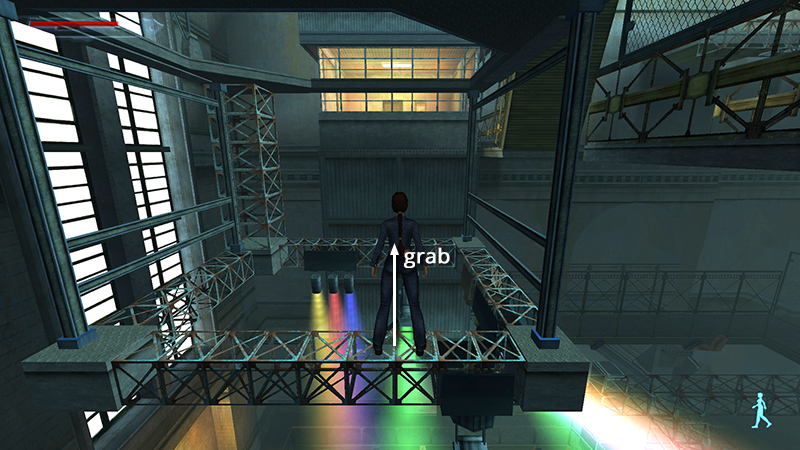
Pull up, then activate walk mode to keep Lara from falling off as she maneuvers on the narrow struts. Jump forward with Action. Lara will either land on her feet or grab the edge on the opposite side of the rig, so you'll then need to pull up, but if you don't grab, she'll overshoot the strut and fall to her death.
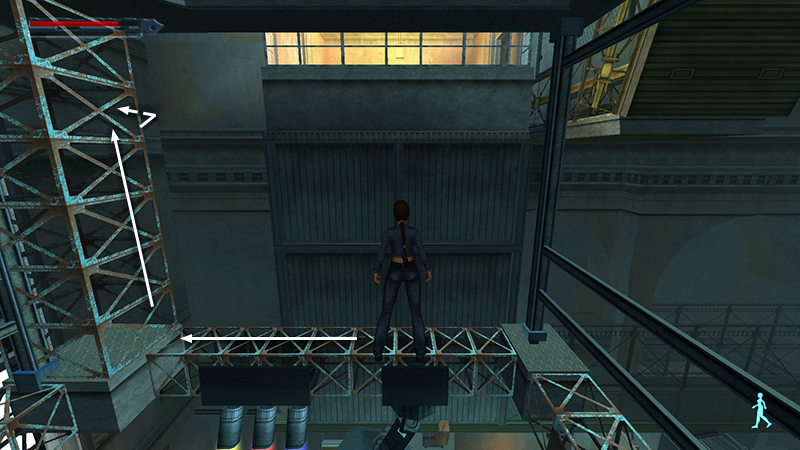
Walk to the far left corner, grab onto the vertical strut, and climb around to the right...
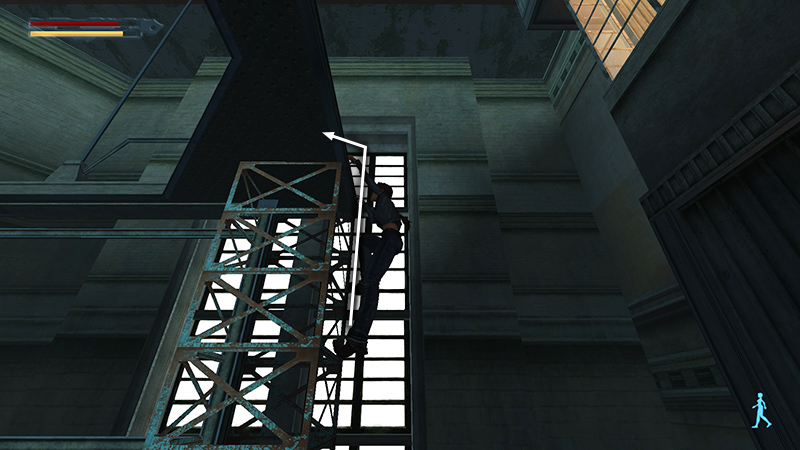
...then up to the top of the structure.
NOTE: You can take a small shortcut here, missing one pickup, which you can then get later if you like. See the footnote in the main walkthrough for details.
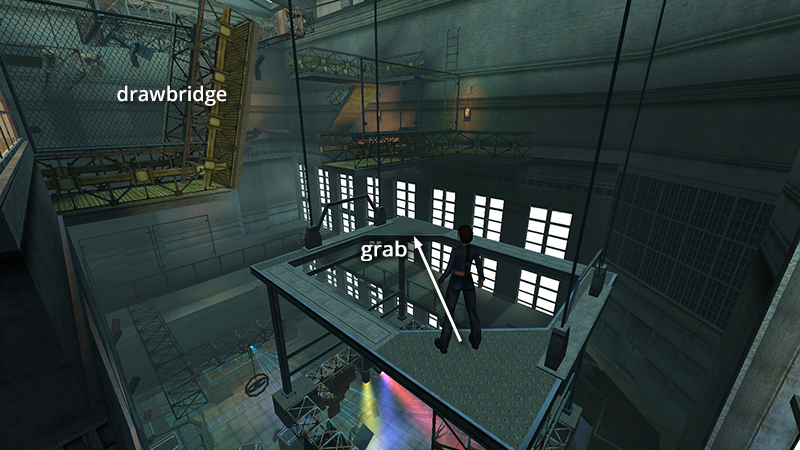
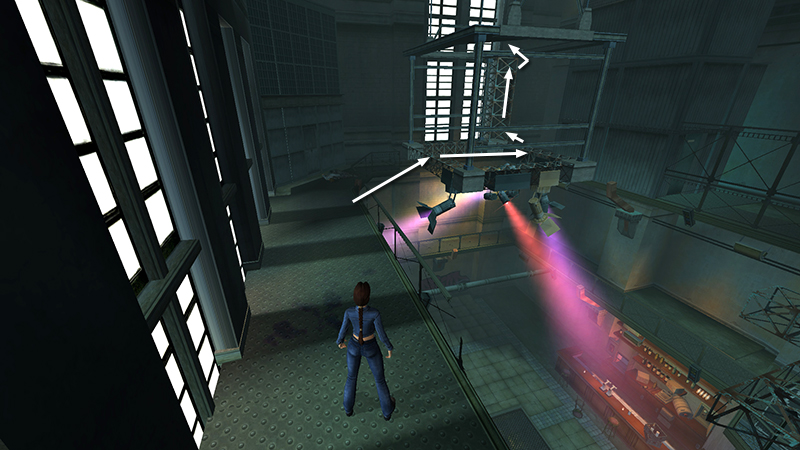
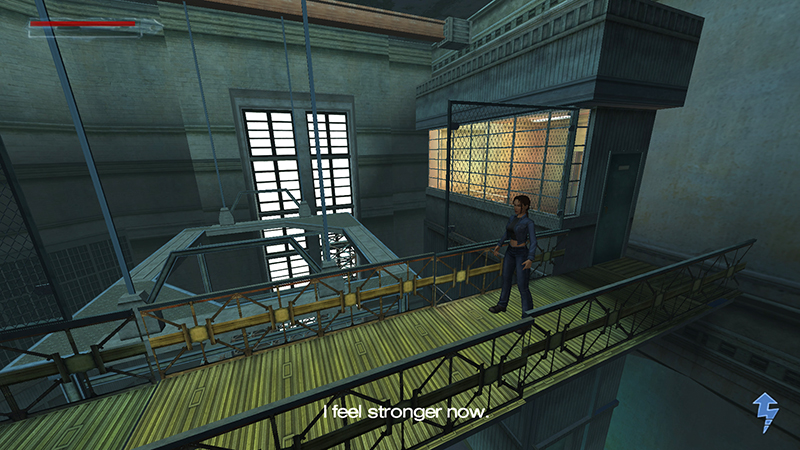
Once Lara is on top of the lighting rig, walk carefully to the middle of the triangular corner ledge. Face the diagonally opposite corner of the rig, jump forward, and grab the other corner ledge. Pull up.
Turn so the catwalk with the raised drawbridge is on Lara's left. Walk to the edge nearest the walkway with the ladder. When the rig moves to its highest position, jump down onto that ledge. Climb the ladder or just pull up onto the ledge above.
Approach the ramp on the other side of this ledge, turn around, and slide down facing uphill. Press Action as you slide so Lara grabs the edge.
Traverse around the corner to the right and pull up onto the ledge with the Desert Ranger clip (29).
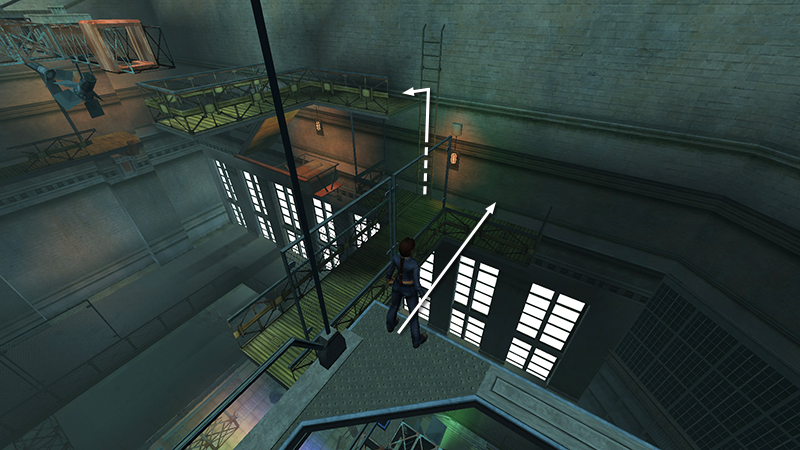
When you have it, walk to the outer corner of the ledge. Take a standing jump to grab the catwalk railing just to the right of the ladder you climbed earlier.
Pull up. Then climb the ladder or pull up onto the ledge, just like you did before.

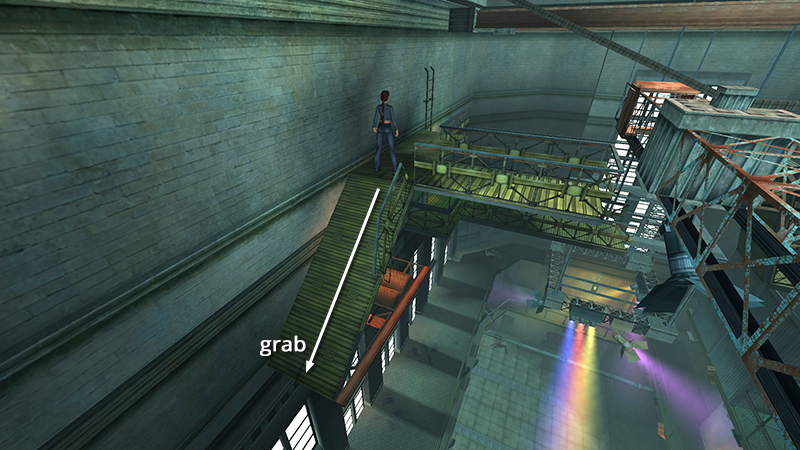
This time, cross the ledge, slide down the ramp facing forward, and jump near the end of the slope to land on the corner ledge. Turn left, jump across the gap, and walk to the end of the broken ledge.
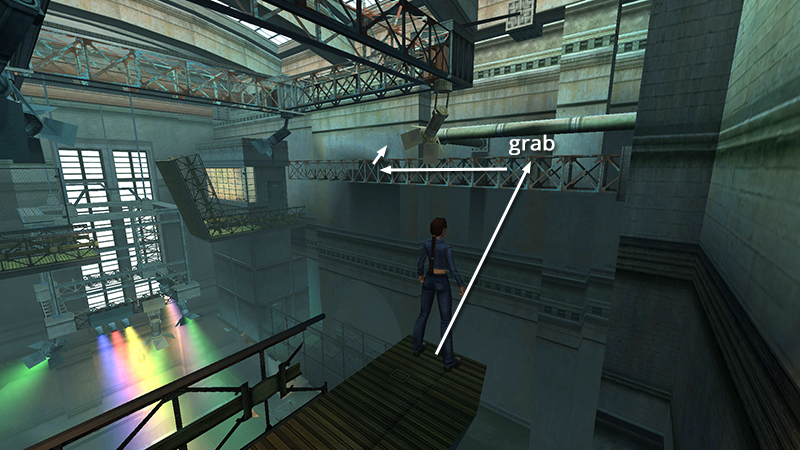
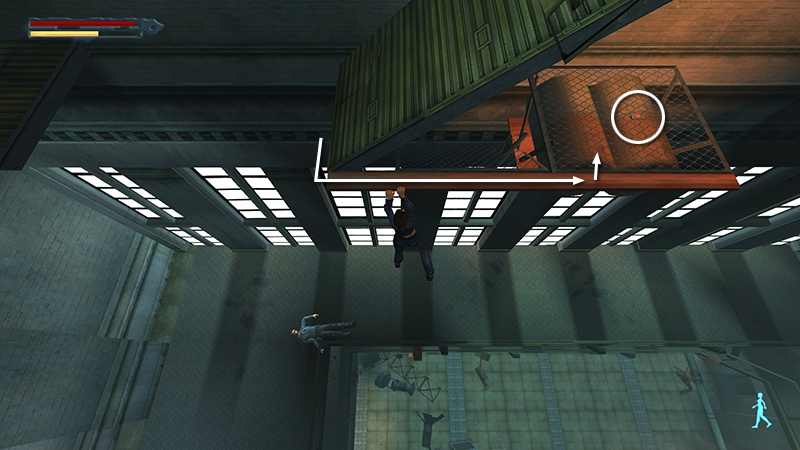
Jump forward and grab the horizontal strut ahead. A pipe running above the strut prevents Lara from pulling up right away, so traverse to the left until she can.
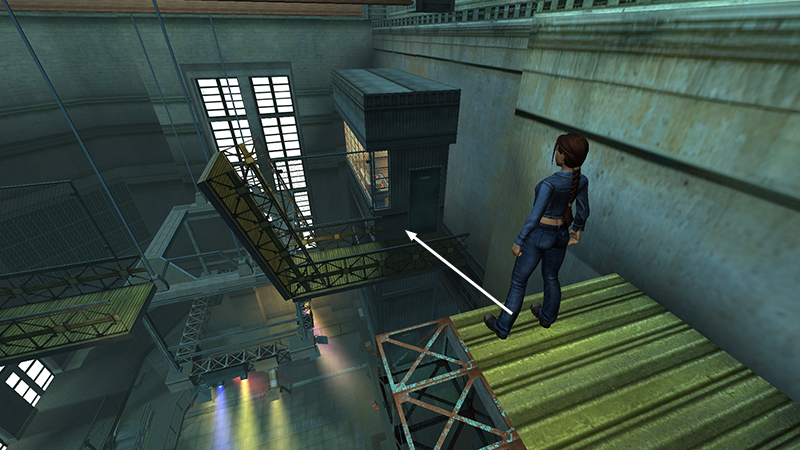
Turn left, walk forward to the edge, and jump down onto the ledge near the LIGHTING BOOTH door.
Lara can't open the LIGHTING BOOTH door yet. So approach the raised drawbridge and press Action to kick it down...
...and get a lower-body strength upgrade.
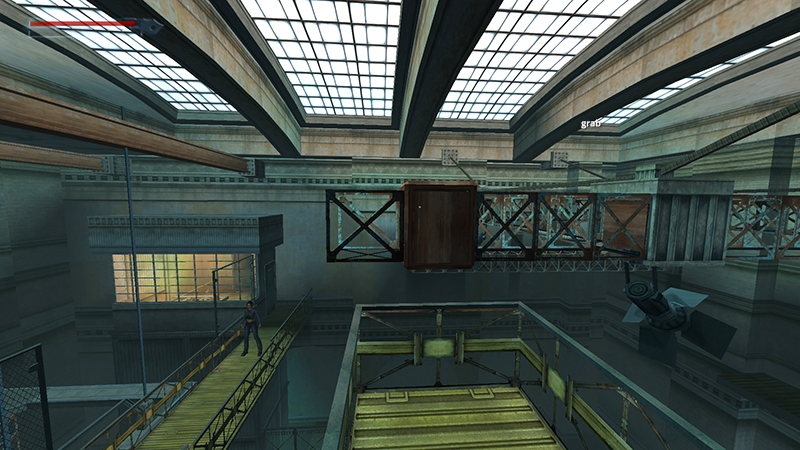
A cutscene shows a second lighting rig, which isn't moving, and draws your attention to the wooden cabinet at one corner of this rig.
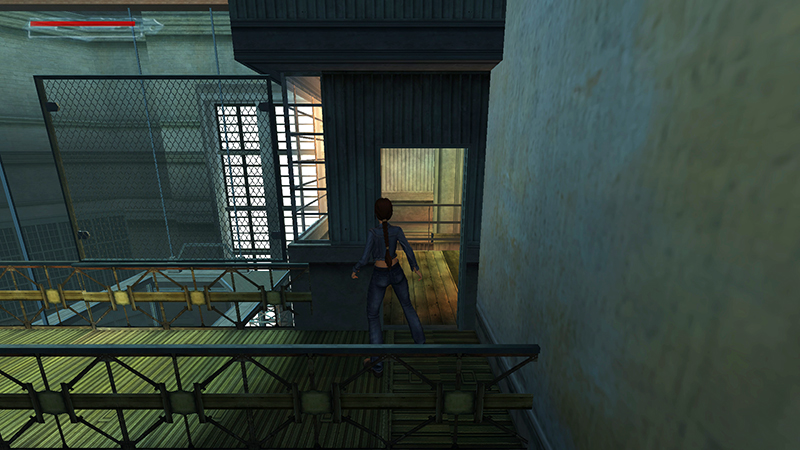
After the upgrade, Lara can kick down the locked door and go inside.
[Previous | Next | Serpent Rouge]
DARK MODE: I plan to add optional dark mode for these pages, but my current priority is updating the walkthroughs. Meanwhile, may I suggest a reputable dark mode browser extension, such as Dark Reader? (Download only from trusted sites, like darkreader.org or your browser's official add-on/extension site.)
Walkthrough text and diagrams copyright © Stellalune (email ). Feel free to copy or print this walkthrough for personal use. By all means, share it with friends, but please include this credit line so people can send me their feedback. No part of this walkthrough may be reproduced on another site without permission.