Trajan's Markets - Starting Area with Abandoned Buildings
Enter the first two rooms on either side of the street.
Each contains some tools, a wheelbarrow, etc., and a small box.
Shatter the boxes with your pistols and pick up a LASER SIGHT (1) (34/239), yet again...
...and a CROWBAR (2) (35/239). Both rooms have enticing ledges above. You can't reach them yet, though.
Continue along the street. The second door on the left, with the "Pericolo" (Danger) sign, doesn't open. You'll be able to reach the ammo inside later from behind. For now, approach the corrugated metal door third on the right, which is also marked "Pericolo."
Press Action to pry it open with the CROWBAR.
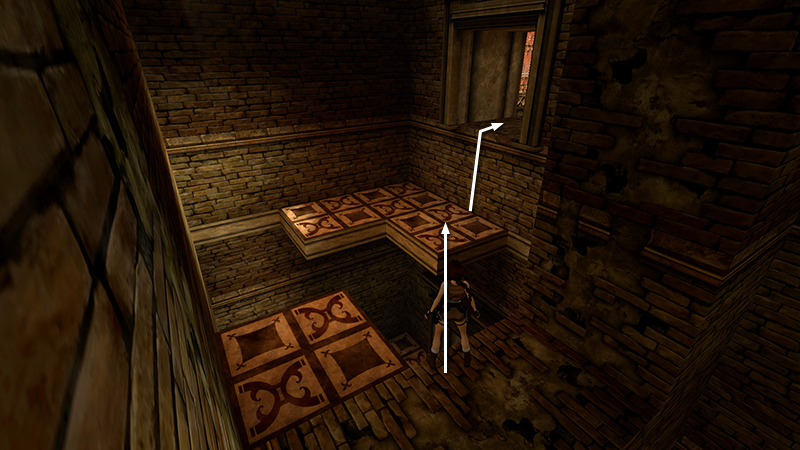
Enter, crouch, and shoot the little box to get the small medipack (3) (36/239) inside.
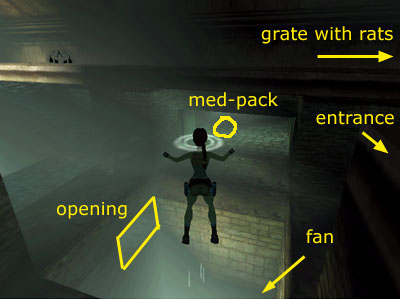
Climb onto the scaffolding, then the stone wall above.
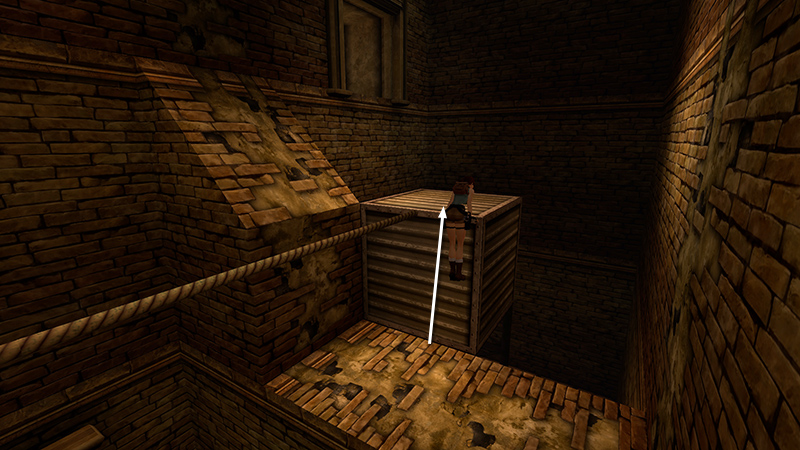
Turn around and pull up onto the metal box where the tightrope is anchored.
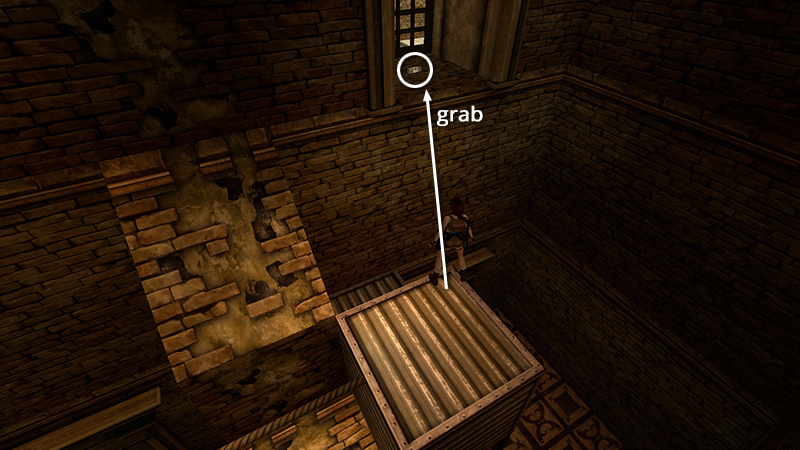
Before using the tightrope, walk carefully to the corner of the box nearest the windowsill with the small medipack (4) (37/239). Take a standing jump from the box and grab the sill. Pull up and take the health pack.
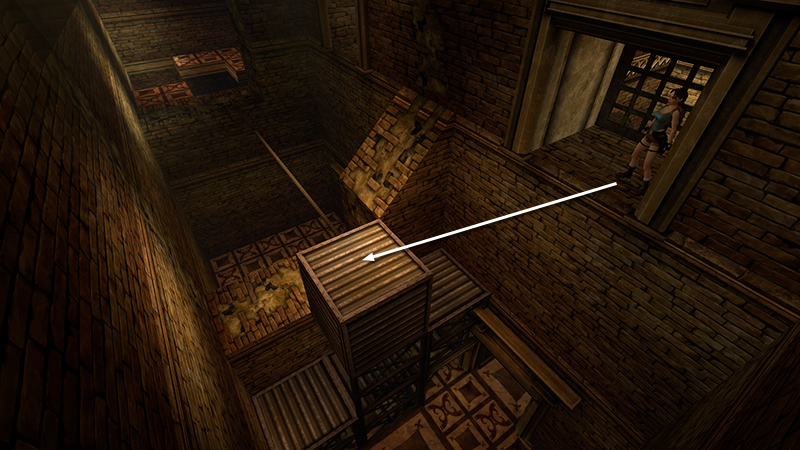
Then turn around and take a carefully angled standing jump back down to the metal box.
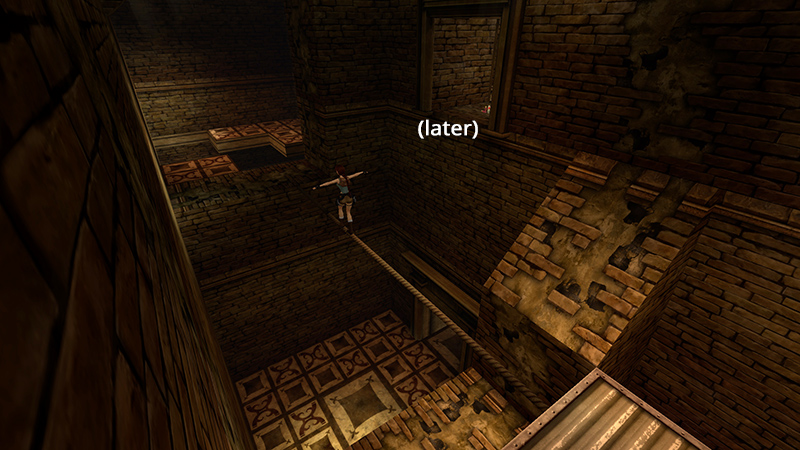
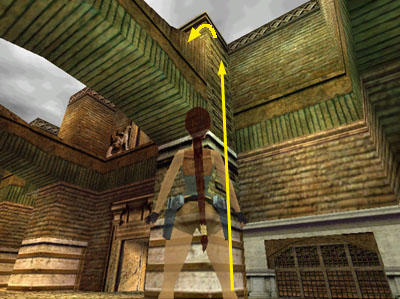
Walk the tightrope to the other side of the room. (Check the tutorial if you need a refresher on tightrope mechanics. And ignore the shotgun shells on the middle windowsill for now.)
Jump onto the L-shaped corner ledge. Climb into the opening on the right.
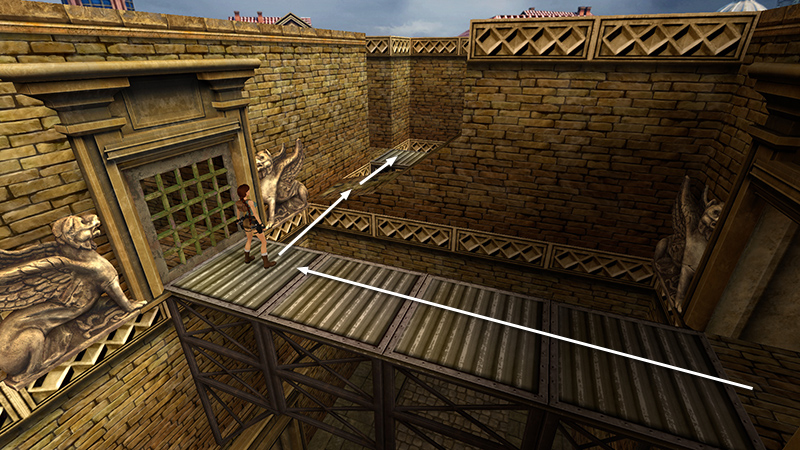
Cross the metal walkway above the street where you started. Turn right and take a standing jump to the angled ledge, then another standing jump to the metal ledge beyond.
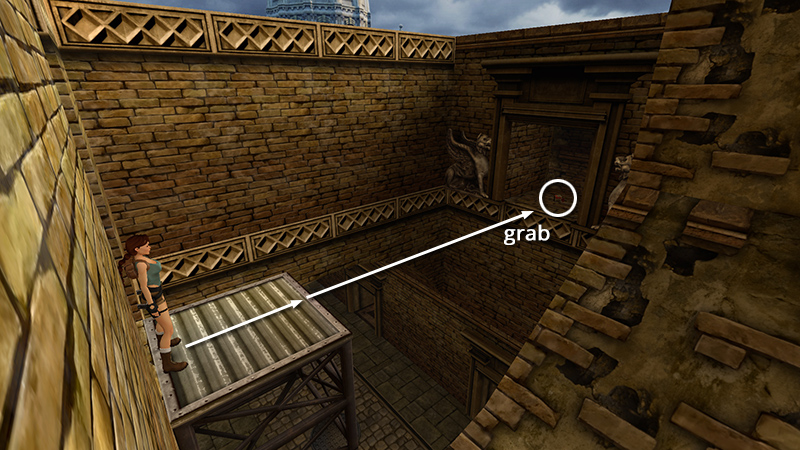
Turn right and take a running jump to grab the sill with the shotgun shells (5) (38/239) you saw earlier. Pull up and take the ammo.
Then repeat the running jump-and-grab to get back to the metal ledge.
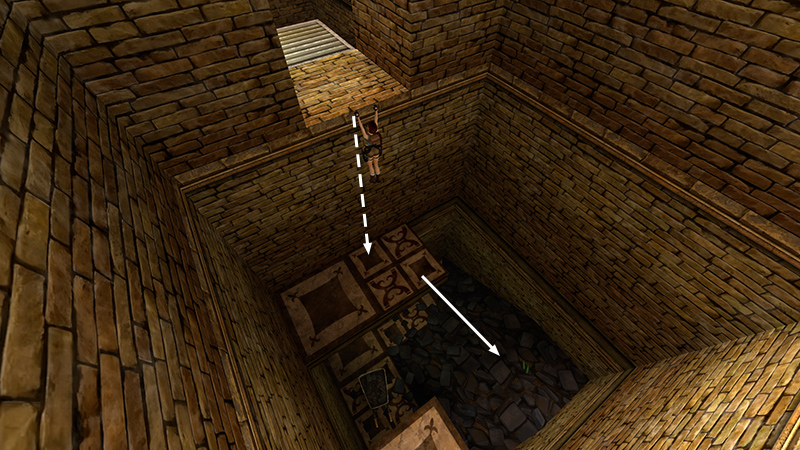
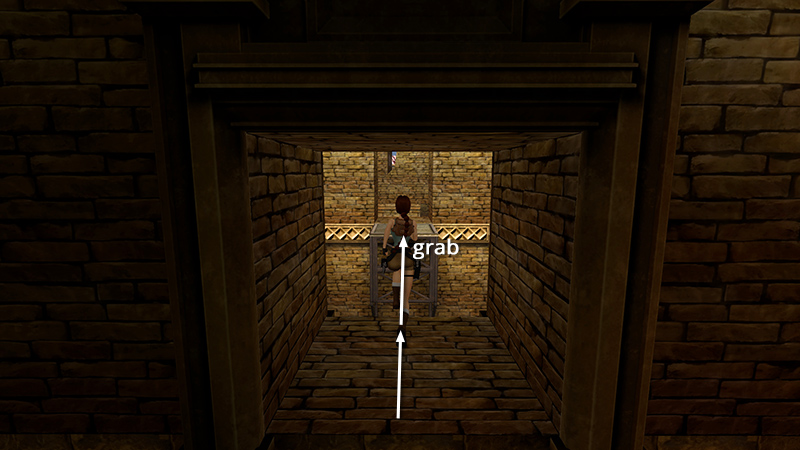
Safety drop into the next room (i.e., hang from the doorway and drop onto the ledge below).
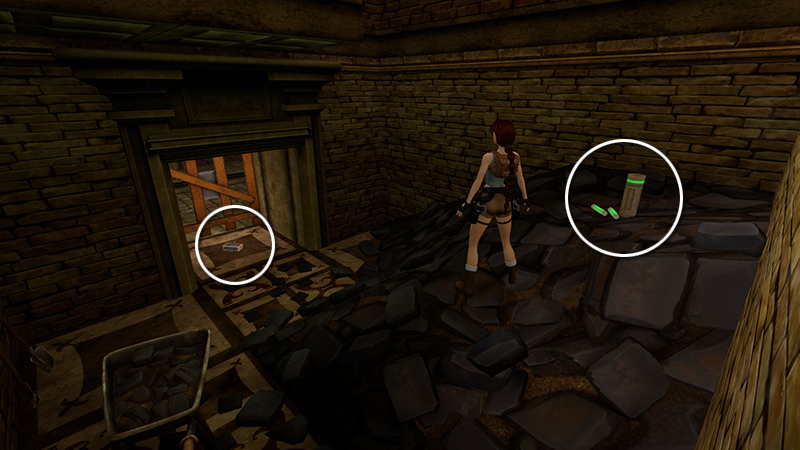
Pick up flares and the revolver ammo (6-7) (39-40/239) you glimpsed from the street earlier.
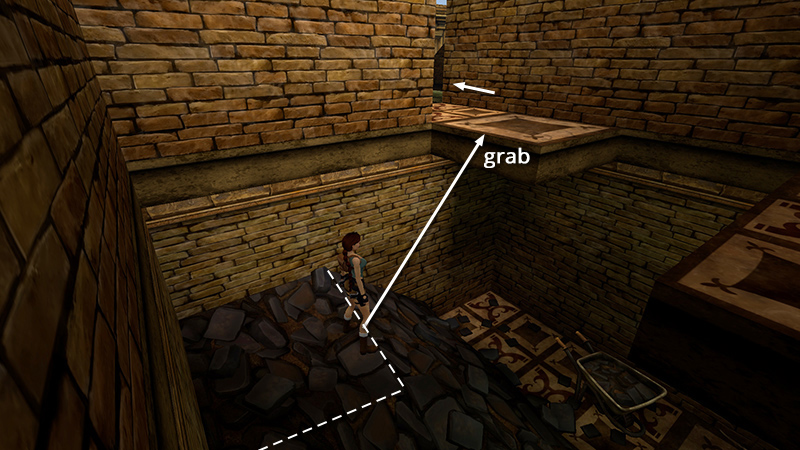
Stand on top of the rubble heap where the flares were, walk to the edge of the flat area, and take a standing jump to grab the square corner ledge. Pull up and enter the next room.
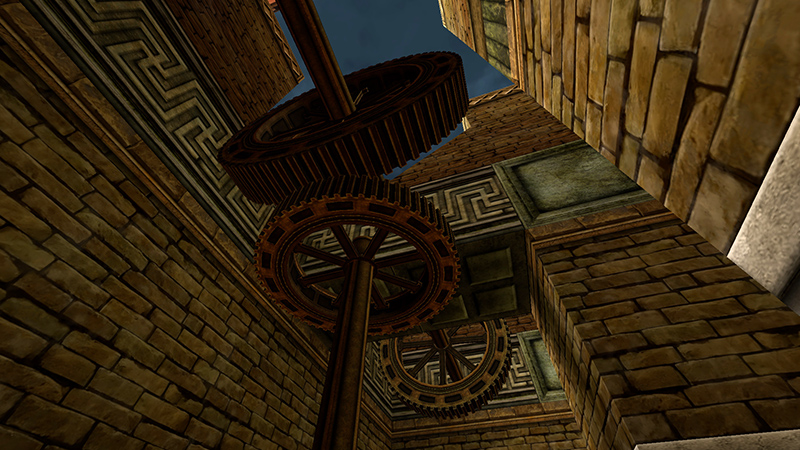
Cutscene: An array of gears.
DARK MODE: I plan to add optional dark mode for these pages, but my current priority is updating the walkthroughs. Meanwhile, may I suggest a reputable dark mode browser extension, such as Dark Reader? (Download only from trusted sites, like darkreader.org or your browser's web store.)
Walkthrough text and diagrams copyright © Stellalune (email ). Feel free to copy or print this walkthrough for personal use. By all means, share it with friends, but please include this credit line so people can send me their feedback. No part of this walkthrough may be reproduced on another site without permission.