Atlantis - Room with Incubators, Switches, and Underwater Doors
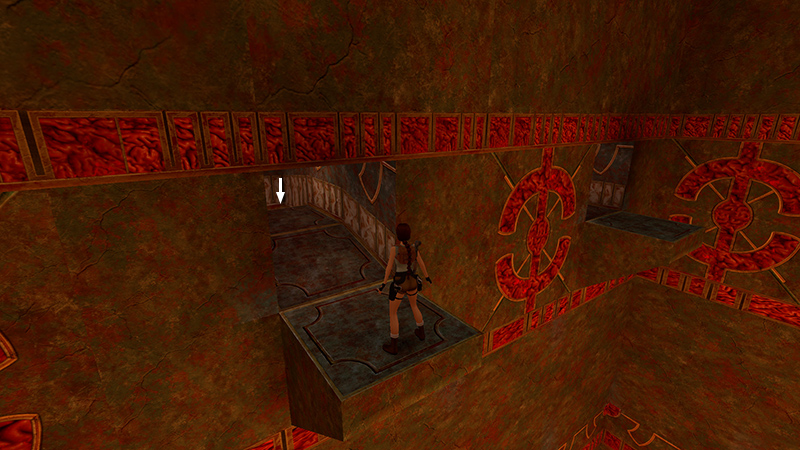
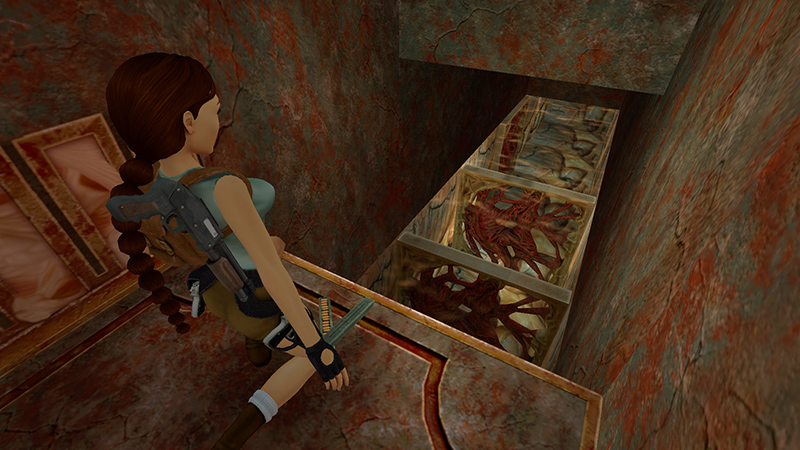
From the second ledge above the lava pool (i.e., the one without the blades), follow the short hallway to another flooded opening.
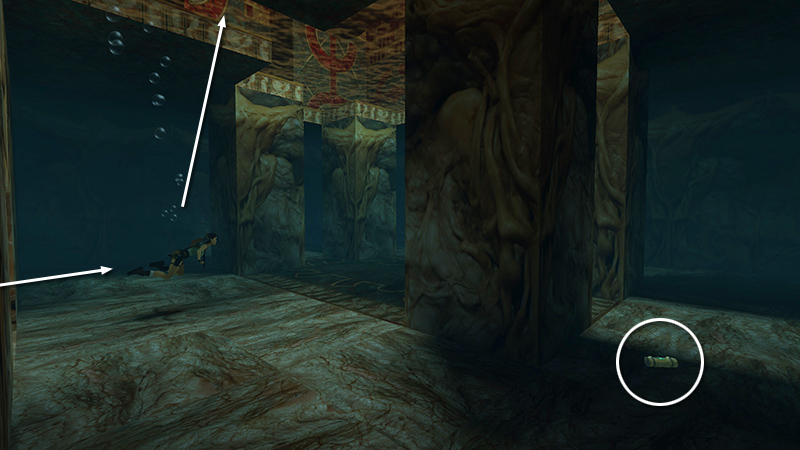
Swim down and forward into a room with 4 underwater pillars. Behind the first pillar on the right is a small medi pack (21). Grab it and surface near the entrance.
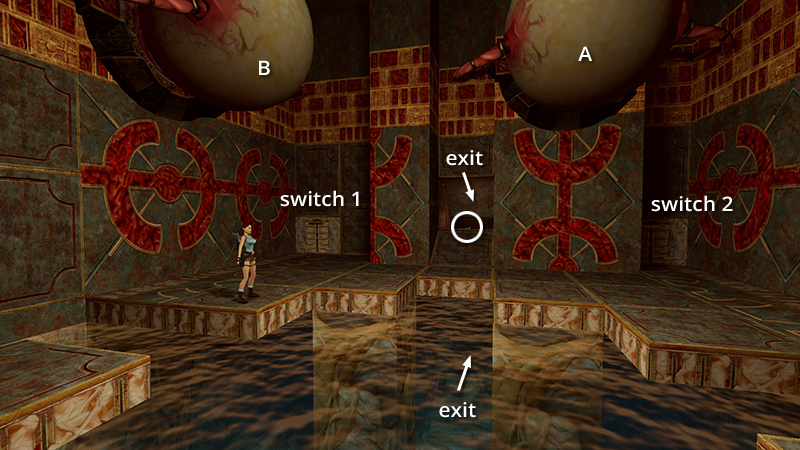
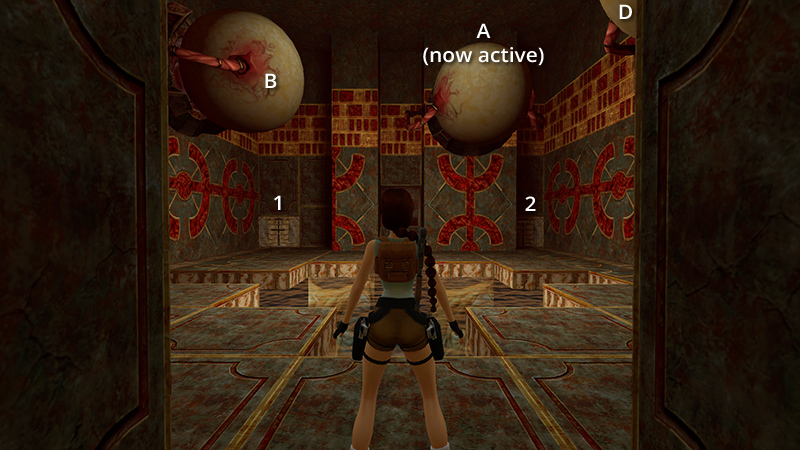
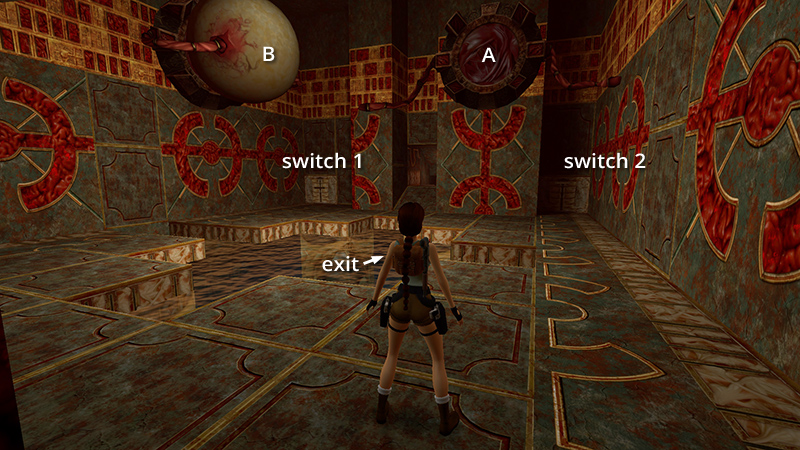
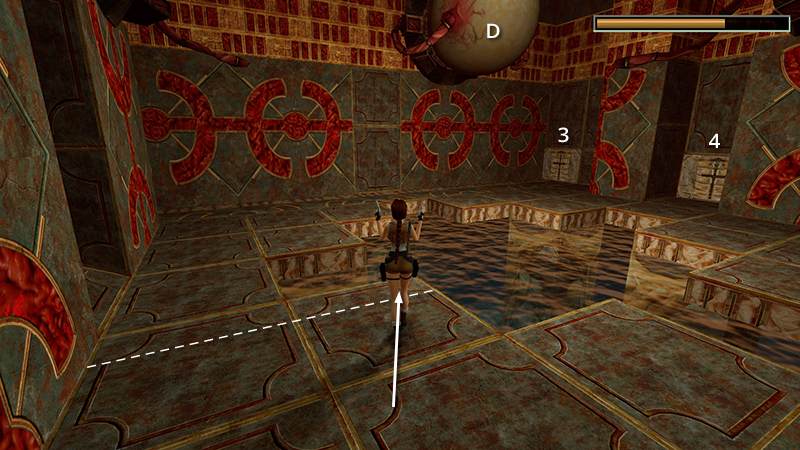
This room contains 4 mutant incubators, none of which are active yet. There are also 3 underwater doors on the left (north) side and 5 switches (plus a convenient save crystal in NG+). You only need to pull 3 of the switches (#1, #3, and #4) to open the doors so you can exit. The other switches activate the incubators. Each switch and incubator described here is also labeled in the screenshots and in the diagram above.
OVERVIEW - NORTH WALL:
Switch #1 opens the outer exit door (one of three closed doors).
Ramp leads to a 2x Uzi ammo pickup (22-23) and the exit.
Underwater passageway below also leads to the exit.
Switch #2 (optional) activates incubator B.
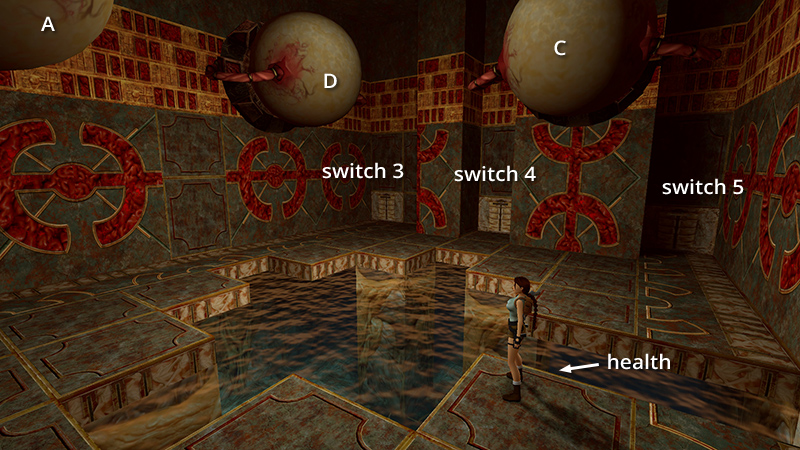
OVERVIEW - SOUTH WALL:
Switch #3 opens middle exit door.
Switch #4 opens inner exit door and activates incubator A.
Switch #5 activates incubators C and D.
Small medi pack (21) underwater (picked up as you enter).
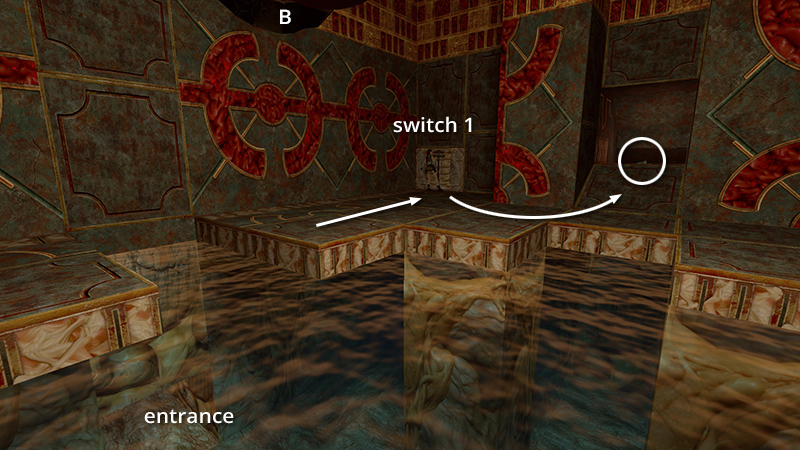
Start with switch #1 in the northwest corner. Use it to open the outer door. Walk up the short ramp between the two switches...
...to get 2 sets of Uzi clips (22-23) and a closer look at the exit doors. (The outer one should be open after using the first switch.)
Continue clockwise around the perimeter of the room. Skip switch #2 in the northeast corner. Use switch #3 in the southeast corner to open the middle door. Continue to switch #4, the middle one of the three on the south wall, and use it to open the inner door.
It also activates incubator A, the one on the northeast side of the room between switch #2 and the exit. You'll see the arms holding the egg begin to move.
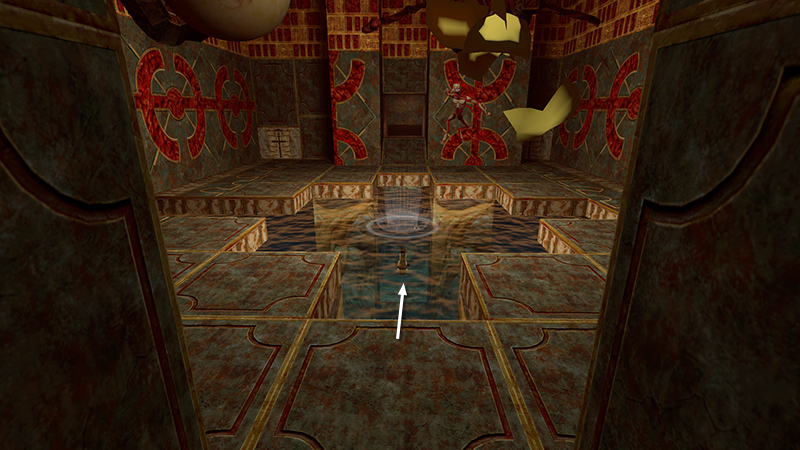
You can now choose to skip the next four kills, or take between one and four of them. For no kills, after opening all three doors, dive into the water and quickly swim straight through and away. (Again, the exit is directly opposite switch #4, in the middle of the north wall.)
- OR -
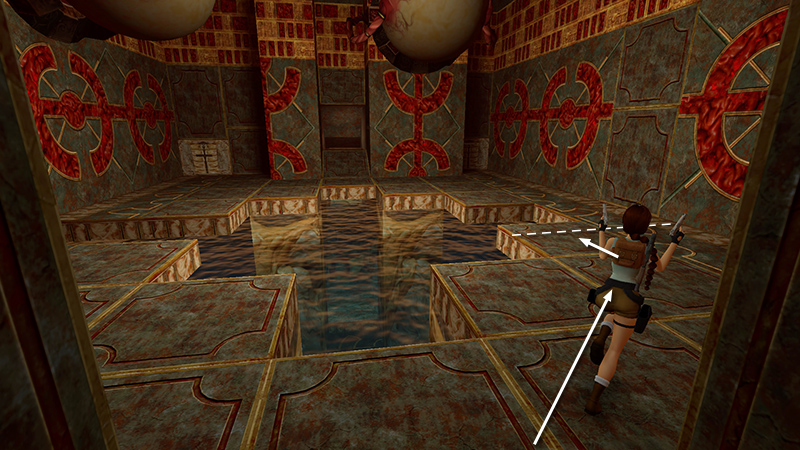
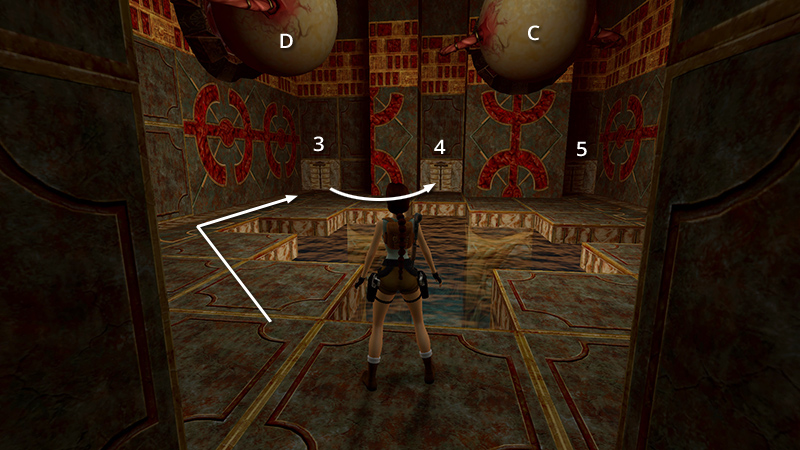
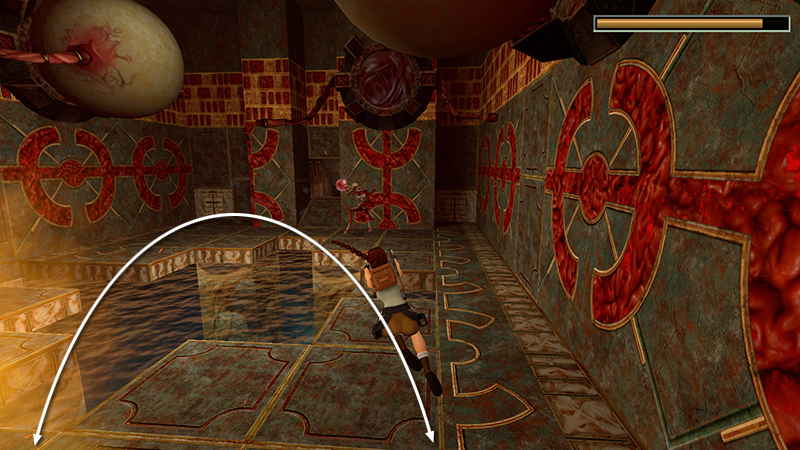
For one kill, after throwing switch #4, approach incubator A to hatch the egg and kill the projectile-hurling mutant (10) inside. I found a consistent strategy is to approach the egg along the right (east) side of the pool. Step forward just far enough to hatch the egg, as shown by the dotted line in the screenshot above.
Get a lock on the mutant and backflip once.
Then keep firing as you continue to side flip left to right. Just be sure to back up far enough that Lara doesn't fall in the water when you jump to the left, or you'll have difficulty getting out without being toasted. Now, if you don't care about the remaining kills, you can leave through the underwater doors.
- OR -
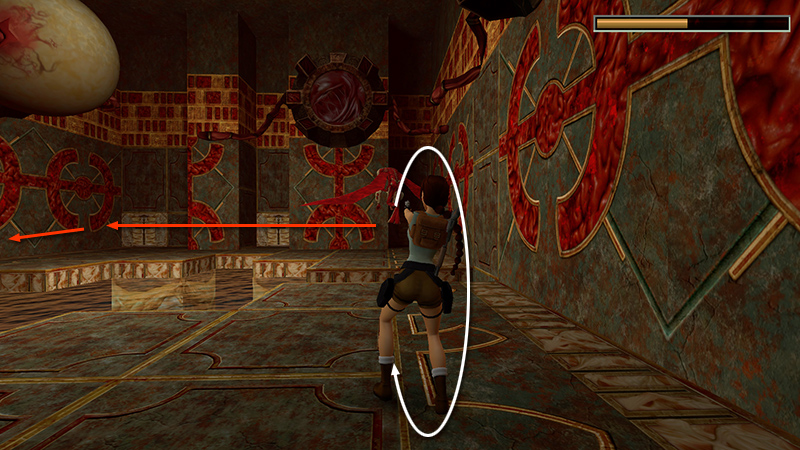
For the rest of the kills, use switch #2 (in the northeast corner, near the incubator that just hatched) to activate incubator B (in the northwest corner between switch #1 and the entrance).

Use the same basic tactic to destroy the flying mutant (11) inside: Approach the incubator with guns drawn, just close enough to hatch the egg...
...backflip away...
...then flip from side to side while shooting, and it shouldn't harm Lara.
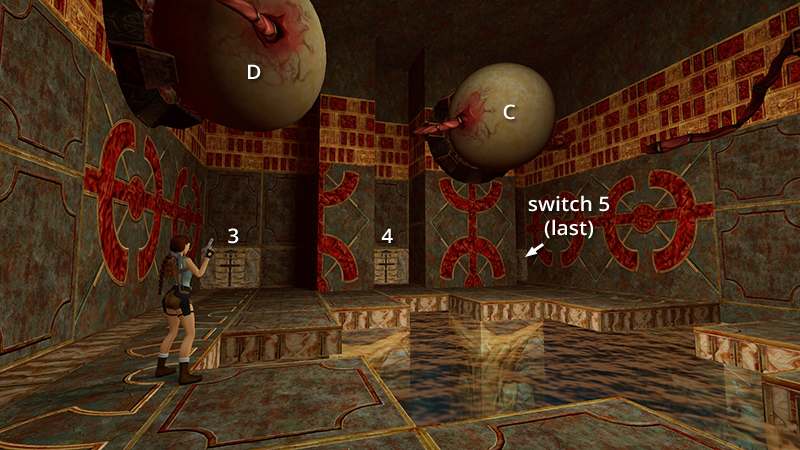
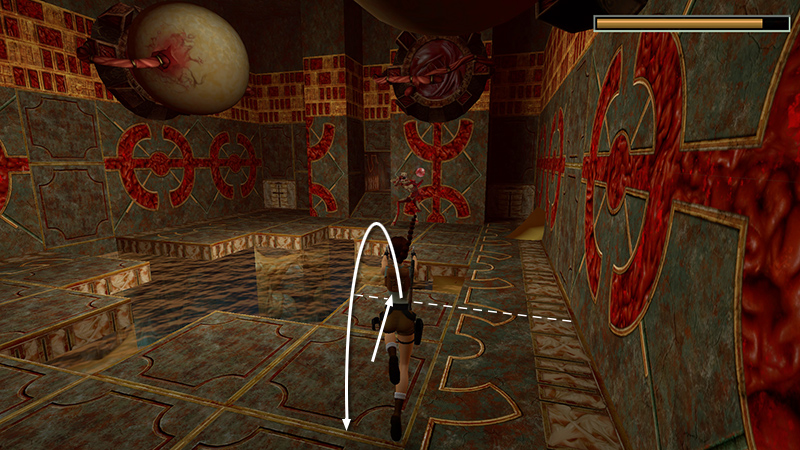
Switch #5, in the southwest corner, activates the last 2 incubators. The one just above the switch (C in the diagram) hatches immediately, and another winged mutant (12) attacks.
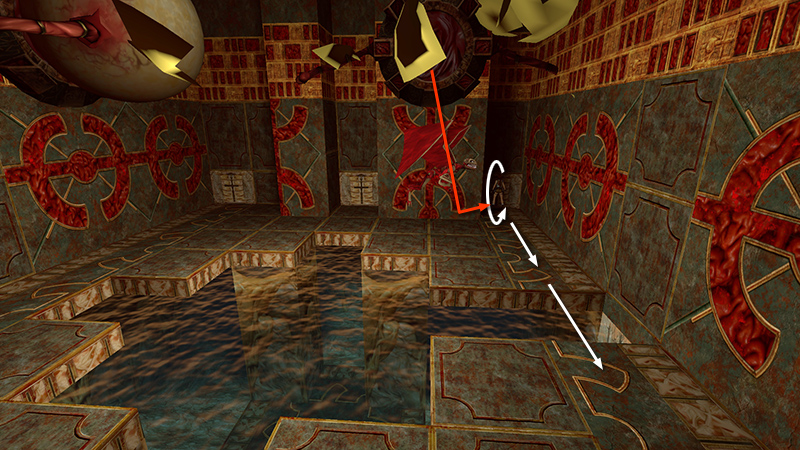
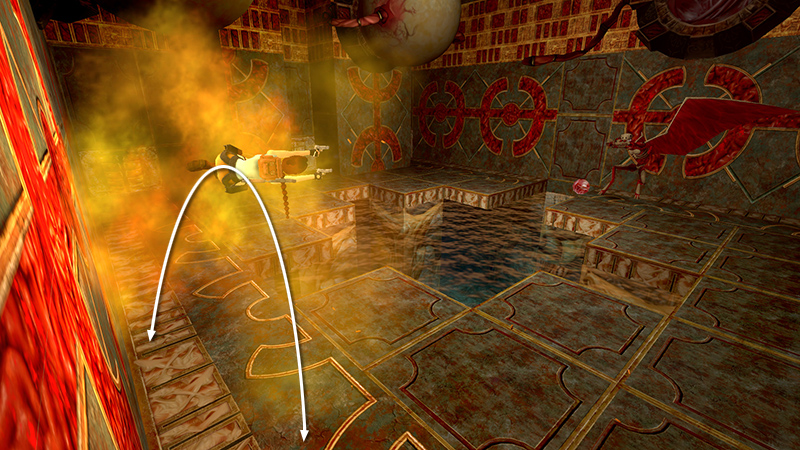
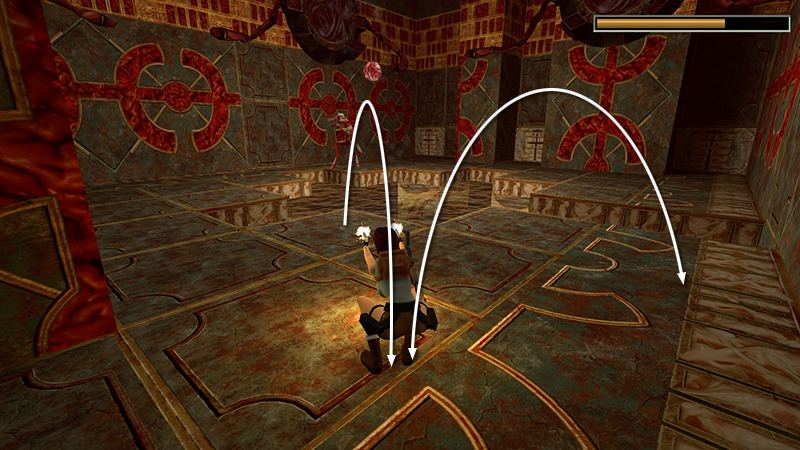
To prevent it from pinning Lara in the corner, as soon as you pull the switch, roll, and run/jump away from the switch and across the pool.
Roll again and start firing. The mutant won't cross the water, so you'll have a little time to maneuver and shoot as it makes its way around the pool toward you.
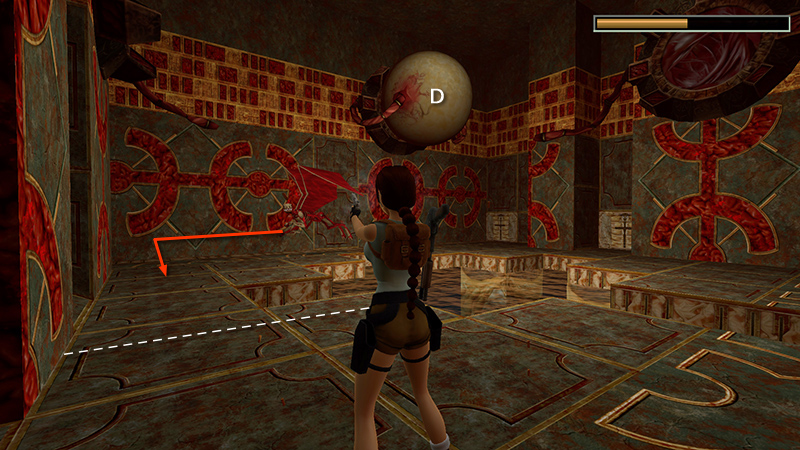
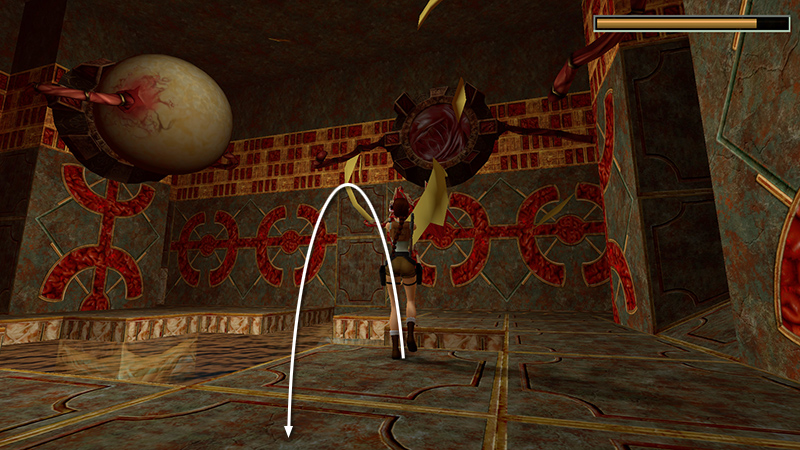
Just take care not to step past the broken line in the screenshot above, or the other egg (D) will hatch, and you'll have 2 mutants on your hands at once. You'll probably be able to destroy the flying mutant as it approaches, but if it does start throwing fireballs, flip side to side while shooting, as you've done before.
When the flier is dead, step forward to hatch the remaining egg (D), releasing a fourth projectile-hurling mutant (13). If you approach on a slight angle, as shown here...
...you can then backflip away, then side flip right and left while shooting and not fall in the water.

Then swim through the 3 doors you just opened.
[Previous | Next | Atlantis Walkthrough]
DARK MODE: I plan to add optional dark mode for these pages, but my current priority is updating the walkthroughs. Meanwhile, may I suggest a reputable dark mode browser extension, such as Dark Reader? (Download only from trusted sites, like darkreader.org or your browser's web store.)
Walkthrough text and diagrams copyright © Stellalune (email ). Feel free to copy or print this walkthrough for personal use. By all means, share it with friends, but please include this credit line so people can send me their feedback. No part of this walkthrough may be reproduced on another site without permission.